Learn How to Effectively Utilize The TIMELINE
Are you trying to create a new story on the Timeline? Do you want to learn about all the features you can utilize ?
While some may think adding a new Story is quite self-explanatory, many beginners find the interface a bit overwhelming. Not to mention, sometimes even the more savvy users are surprised to find the hidden gems on the post edit screen.
In this beginner’s guide, I will take you through all the features on the add new post screen, and how you can utilize them to create better content. I have divided this guide into two sections, to help you easily find what you’re looking for:
- Creating a new Story on the Timeline using the default editor (Recommended)
- Bonus tips for creating better blog stories
1. Creating a New Story Using The Default Editor
The editor in use on the Timeline Magazine is a new modern block-based editor also known as Gutenberg. It is clean and simple, but don’t let the looks deceive you.
Behind its clean interface, there are tons of powerful features neatly tucked in. I’ll explain all of them and help you unlock its true potential.
Adding Title and Content Blocks
The Timeline editor comes with a clean writing interface. At the top, you will enter your post’s title.
To add content, you need to add a block. There are multiple add block buttons on the screen that you can click to select and add a block.
If you don’t want to use a mouse to click on the button, you can use a keyboard shortcut by typing / to search and add a block.
All content elements are wrapped in a block. The editor comes with blocks for all the common content items including paragraph, columns, images, gallery, embeds, short-codes, widgets, and more.
Adding Images, Videos, & Other Media
You can add images by simply adding the image block and then upload or select the image you want to add.
If you want to text and image next to each other, you can use the ‘Media & Text’ block. This block helps you wrap text around the image in WordPress.
The editor also comes with a Gallery block that you can use to display images in rows and columns with a grid layout.
Simply add the Gallery block and then upload or select the images from your media library.
Want to embed a video in your content? No problem.
The editor comes with embed blocks for all popular providers.
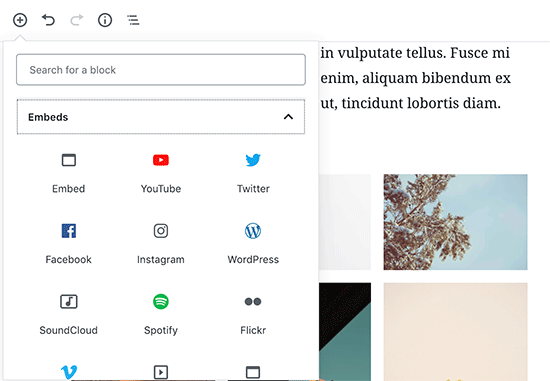
You can also just copy and paste the video URL to a paragraph block, and WordPress will automatically convert it into a video embed block.
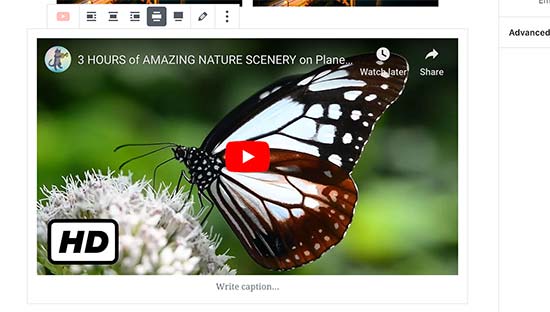
We discourage directly uploading videos to the Timeline website because it will slow down the website and can even crash our hosting server.
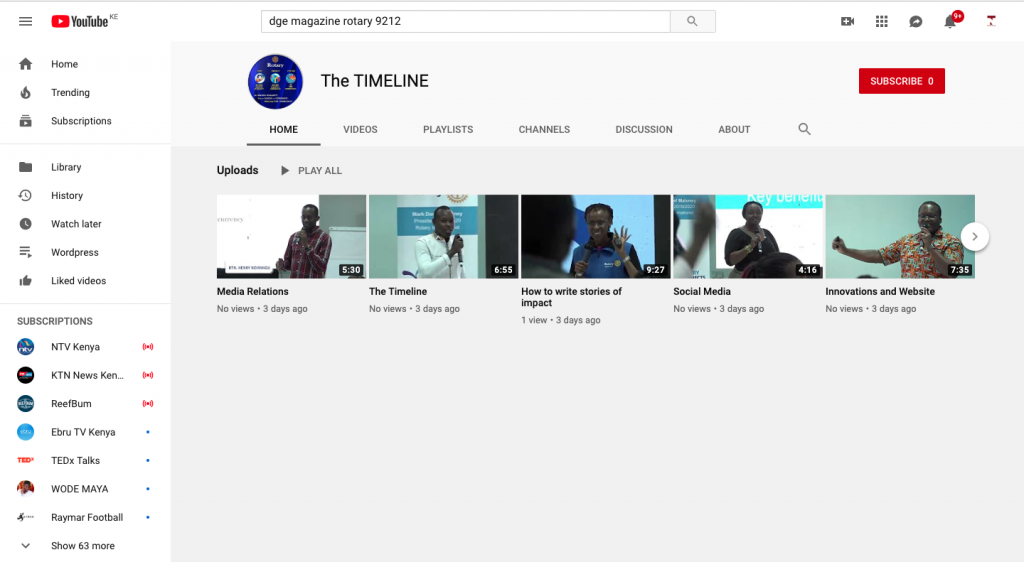
Instead, we recommend uploading your videos on a service like YouTube (Rotary club Youtube Channel or the DGE Magazine Youtube Channel and then embed it on your story. Send your Videos to dg.e.magazine@gmail.com to be uploaded (Contact Sidy after Sending on 0712768279 )
Adding Categories and Tags
The Timeline editor allows you to sort your stories into categories and tags. These taxonomies help you organize your content into sections and topics.
They also help with SEO and make it easier for users to find the content they are looking for.
The categories and tags meta boxes are located in the right-hand column, under the Document settings.
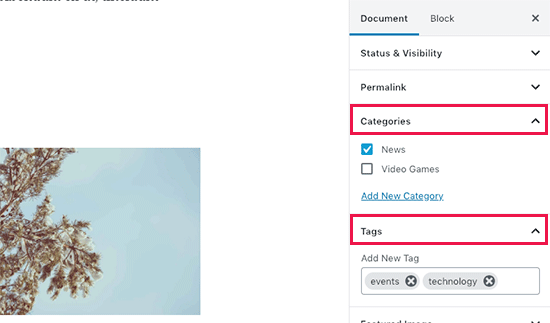
We have the following categories on the Timeline for use;
- THE DRR’S CHRONICLES– platform for the Rotaract District Representative message.
- THE EDITOR’S BOARD – Platform for the Chief Editor’s message.
- THE EDITOR’S THOUGHTS – Platform for the Editor’s message.
- THE FEATURE STORY – platform where one main story is highlighted in a month and shared under this category.
- THE GOVERNOR’S BLOG – platform for District Governor (9212) message.
- ROTARY NEWSCAST – This is where all rotary stories happening in the international scene are shared.
- THE ROTARACT RAVE – This is where all Rotaract stories happening within the District are shared.
- THE ROTARY WAVE – This is where all Rotary stories happening within the District are shared.
- VIDEOS – This is where stories in form of videos are shared.
Adding Featured Image
A featured image (also known as post thumbnail) is the main article image which represents the content. They’re prominently displayed on your story on single posts, blog archive pages, as well as on the homepage of the Timeline.
You will find the option to add a featured image to your post in the right column under the Document settings.
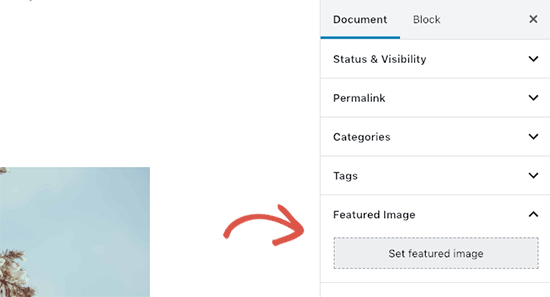
Click on the ‘Set featured image’ button and then select or upload the image you want to be used as the featured image.
Adding Excerpts (Article Summary)
Excerpts are the summary of a blog story or article. Don’t forget to add a summary of your story.
You can do so by adding it in the excerpt box located under document settings column on the right.
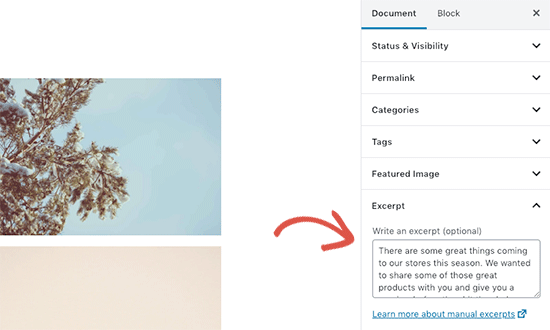
Changing Author
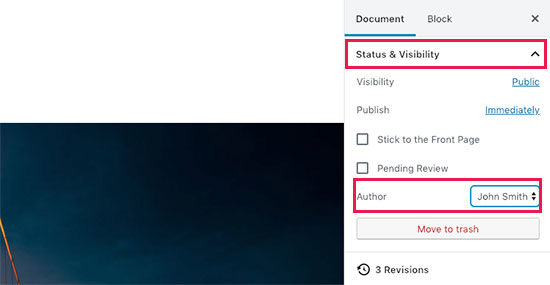
The Timeline Magazine runs as a multi-author website, If you have uploaded a story written by another author then you can also change a post’s author and assign it to a different author before you publish.
You will find the option to change author under the ‘Status and Visibility’ tab in the right column.
Publishing Options
The default Timeline editor screen is divided into two columns. The left column is where you write content, and the right column has all post settings including publishing options.
Let’s take a look at publishing options in the right column.
1. Save draft link allows you to quickly save changes you made to your story. The editor will also automatically save your changes as you write.
2. The preview button will open a live preview of your post or page in a new browser tab.
3. Once you are done editing your post, you can click on the Publish button to make your post go live.
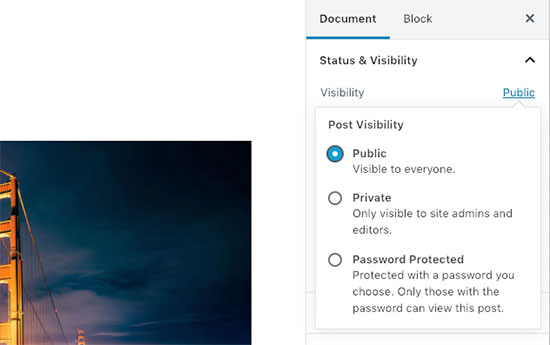
4. The Editor also gives you a few options to control the visibility of your post. The default option is ‘Public’ but clicking on it will show you options to make a post private or password protected.
5. The Editor as well allows you to control when a post is published. The default option is to publish immediately, but you can also schedule your posts to publish later or even select a past date.
6. Checking the box next to ‘Stick to front page’ will make a post sticky or featured. This makes the specific story appear on top of other stories. (Recommended only for The Feature story, The Governor’s Message and the Editor’s Board/Thoughts.)
7. Pending review option will add a custom status next to your post as ‘Pending review’. This feature is particularly helpful on the Timeline as it allows Editors to proof read your story for any mistakes before Publishing. (RECOMMENDED FOR ALL AUTHORS)
8. If you want to delete a post, then you can click on ‘Move to trash’ button. The story will be sent to trash. Deleted stories will remain in the trash folder for upto 30 days. After that, they will be deleted permanently.
2. Bonus Tips for Publishing better Blog Stories
Read about these tips on 8 Tips on writing Rotary Stories with Impact


